
North Richland Hills Wood Flooring has been sanding and refinishing hardwood floors in North Richland Hills, TX for more than 20 years, serving surrounding cities including Watauga, Hurst, Haltom City, Colleyville and Bedford. Refinishing is the service where the wrong first move is the expensive one, because sanding is subtractive and nothing puts wood back. So the first thing we do on a refinishing job is measure what is there to work with.
That measurement is the wear layer on engineered flooring and the depth above the tongue on solid hardwood, read at a vent cut, a doorway or a threshold where the edge of a board is exposed. Under about three millimeters of wear layer there is nothing left to sand, and a drum sander run over it reaches the plywood core. A floor in that condition gets a recoat quote or a replacement quote, not a refinish quote dressed up as a restoration.
We price repair, refinish and replace in that order and name the cheaper option first when it is the right one. Containment goes up and gets walked with you before the first machine runs, one crew takes the job from the first cut to the final coat with the sanding never subcontracted out, and a written cure and occupancy schedule is handed over before any finish is applied.
What a Refinish Can and Cannot Fix
Reading the Wear Layer Before Anything Else
The wear layer is the only real wood on an engineered board, and it is exactly what a sander consumes. Six millimeters survives several full sands, three millimeters usually one, and two millimeters none at all. We gauge it before quoting so the decision is made on a number rather than on how the floor looks from standing height.
Screen-and-Recoat Against a Full Sand
When the damage lives in the finish and not in the wood, a screen-and-recoat abrades the existing coating with a buffer and adds a fresh layer in a day. A full 36-50-80 grit sequence is what stains, deep scratches and cupping need, and it costs more because it removes material. We test-screen a section first, because a recoat that will not bond peels inside a season.
Stains and Damage Sanding Will Not Reach
Black edges are oxidized tannins where water met bare wood; pet stains usually travel through the finish into the fiber and sometimes into the subfloor. Sanding only removes what it reaches, so we sand a test patch and show you the result before pricing the field. Where the stain is deeper than the cut, board replacement is the honest line item rather than a hopeful one.
The Sanding Sequence and the Machines That Do It
The 36-50-80 Grit Sequence
A refinish starts coarse enough to flatten the floor and remove the old coating, then steps through finer abrasives until the scratch pattern is fine enough to take stain evenly. Skipping a grit leaves the previous grit’s scratches under the finish, where they show up as streaks the first time low light crosses the floor. We work the sequence rather than shortening it.
Drum Sander, Edger and Buffer
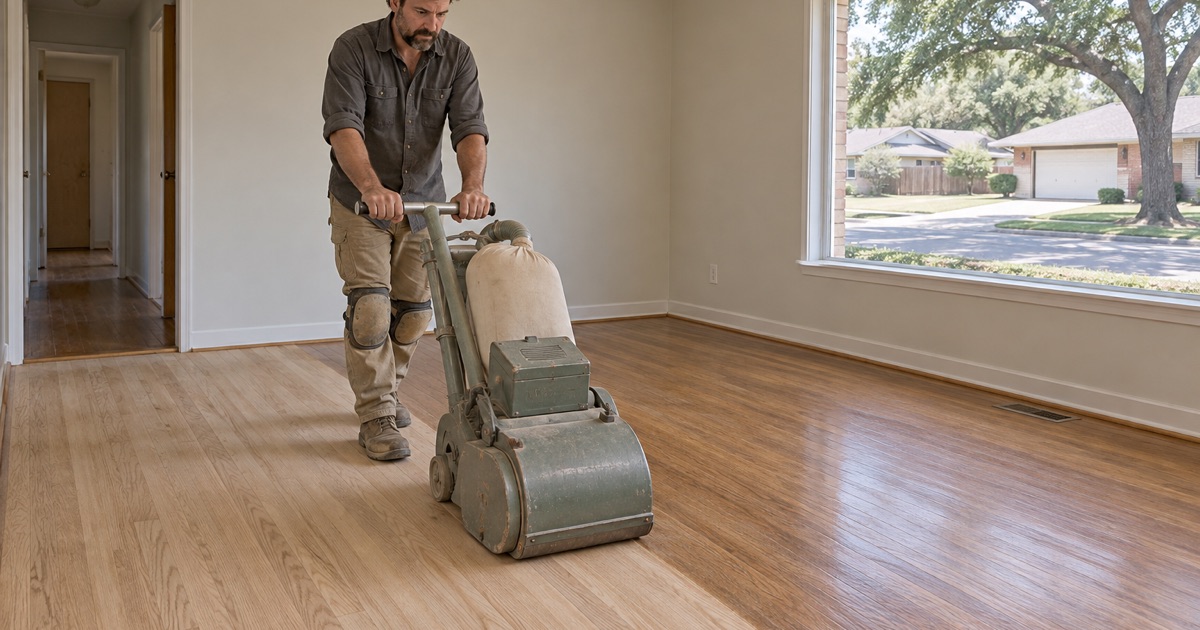
The drum sander does the field, the edger reaches the perimeter and the closets the drum cannot, and the buffer blends the two so the border does not read as a picture frame around the room. Each machine leaves a different scratch signature. Matching them is the part of the work that separates a flat floor from a floor with a visible outline.
Dustless Containment on Every Sanding Job
Every machine runs to a vacuum containment system rather than to a bag, and the room is sealed off before anything starts. We set it up and show it to you first, so you can see where the barrier is rather than trusting a claim. Fine sanding dust that gets into ductwork and closets is the cost homeowners actually feel from this work.
Choosing the Finish
Waterborne Polyurethane
Waterborne polyurethane dries quickly, stays clear and ambers very little, which keeps white oak and gray-toned floors the color you selected rather than drifting warm over the years. It builds in thinner films, so coat count matters more. On a schedule where the house has to be back in use quickly, it is usually the right call.
Oil-Modified Polyurethane and Hardwax Oil
Oil-modified polyurethane builds warmer and ambers with age, which is what makes it the better match when new work has to blend into an older red oak floor. Hardwax oil penetrates instead of forming a hard film, so it repairs in place rather than needing a whole-floor recoat. Each takes a different maintenance routine, and we hand that over with the schedule.
Sanding Sealer, Stain and the Federal AIM Rule
A sanding sealer evens absorption so stain does not blotch on maple or tight-grained boards, and it is a separate product with its own limits. Coatings in this category fall under the federal AIM rule at 40 CFR 59 Subpart D, with varnish at 450 grams per liter and sanding sealer at 550 grams per liter. We use compliant products and say which ones are going on your floor.
Refinishing Older North Richland Hills Houses
Lead-Safe Practices in Pre-1978 Housing
A third of this city’s housing units were built between 1950 and 1979, so pre-1978 work is routine here rather than unusual. Sanding painted trim, treads or floors above the six square foot minor repair threshold is squarely inside the EPA RRP lead-safe rule, so it runs to lead-safe work practices, with containment, HEPA cleanup and cleaning verification to 40 CFR 745 Subpart E.
Narrow Strip Oak Under the Carpet
Houses from the earlier cohort frequently have narrow strip red oak sitting under carpet that was laid over it decades ago, held down with tack strip and sometimes with cut nails. Pulling it back is often the cheapest floor in the house. We check the depth above the tongue and the staple and tack damage before promising a refinish on it.
Matching a Refinish to an Addition
Additions and partial remodels are common on a housing stock this mixed, which makes matching a refinished field to an adjoining run a recurring problem. Species, board width, sheen and height at the transition all have to agree. Where the layout allows it we lace new boards in and sand the whole area as one continuous surface rather than stopping at a T-mold.
Our Step-by-Step Hardwood Floor Refinishing Process
Step 1: Measure and Test Before Quoting
We read the wear layer or the depth above the tongue, meter the boards and the subfloor for moisture, and screen a test section to find out whether the existing finish will take a recoat. The quote comes from those readings.
Step 2: Containment and Site Preparation
Furniture comes out, vents and doorways are sealed, and the containment is set up and walked with you before a machine is plugged in. On pre-1978 houses the lead-safe setup goes up at this stage, not partway through.
Step 3: The Sand
The field is cut with the drum sander, the perimeter and closets with the edger, and the two are blended with the buffer through the full grit sequence. Any board replacement or dutchman patch happens before the final cut so the repair sands flat with everything else.
Step 4: Seal, Stain and Coat
Stain is tested on your floor in your light rather than chosen from a chart, because species, age and the previous finish all move the final color. Sealer and coats go on in sequence with the recoat window respected rather than compressed.
Step 5: Cure Schedule and Handover
You get the written cure and occupancy schedule before the first coat: when the floor takes socks, when furniture returns, when rugs and pets come back, and what to clean it with. Dry time is not cure time, and treating them as the same is how a new finish gets marked in its first week.
- 20+ Years Experience
- Dustless Containment
- Free Written Estimates